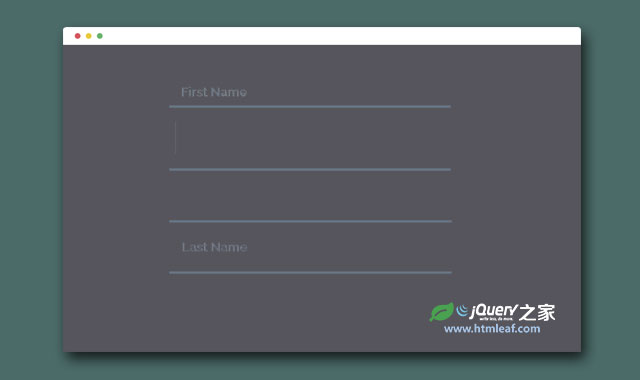

这是一款效果非常酷的分步式用户注册表单UI界面设计效果。在这个设计中简单的将用户注册分为3个步骤,用户填写完每一个步骤的信息后可以点击“下一步”按钮跳转到下一个步骤,也可以通过“前一步”按钮来查看前面的填写内容。在切换步骤的时候还带有非常炫酷的过渡动画效果。
制作方法
HTML结构
该分步式注册表单使用的HTML结构就是一个普通的<form>表单元素。每一个注册步骤都使用一个<fieldset>元素来包裹。
<form id="msform">
  <!-- progressbar -->
  <ul id="progressbar">
    <li class="active">账号设置</li>
    <li>社交账号</li>
    <li>个人详细信息</li>
  </ul>
  <!-- fieldsets -->
  <fieldset>
    <h2 class="fs-title">创建你的账号</h2>
    <h3 class="fs-subtitle">这是第一步</h3>
    <input type="text" name="email" placeholder="Email地址" />
    <input type="password" name="pass" placeholder="密码" />
    <input type="password" name="cpass" placeholder="重复密码" />
    <input type="button" name="next" class="next action-button" value="Next" />
  </fieldset>
  <fieldset>
    <h2 class="fs-title">填写社交账号</h2>
    <h3 class="fs-subtitle">填写你的常用社交网络账号</h3>
    <input type="text" name="x-weibo" placeholder="新浪微博" />
    <input type="text" name="t-weibo" placeholder="腾讯微博" />
    <input type="text" name="qq" placeholder="腾讯QQ" />
    <input type="button" name="previous" class="previous action-button" value="Previous" />
    <input type="button" name="next" class="next action-button" value="Next" />
  </fieldset>
  <fieldset>
    <h2 class="fs-title">个人详细信息</h2>
    <h3 class="fs-subtitle">个人详细信息是保密的,不会被泄露</h3>
    <input type="text" name="fname" placeholder="昵称" />
    <input type="text" name="lname" placeholder="姓名" />
    <input type="text" name="phone" placeholder="电话号码" />
    <textarea name="address" placeholder="家庭住址"></textarea>
    <input type="button" name="previous" class="previous action-button" value="Previous" />
    <input type="submit" name="submit" class="submit action-button" value="Submit" />
  </fieldset>
</form>
CSS样式
该分步式用户注册表单的CSS样式非常简单。首先是input元素和按钮都被简单的进行了一些美化:
/*inputs*/
#msform input, #msform textarea {
  padding: 15px;
  border: 1px solid #ccc;
  border-radius: 3px;
  margin-bottom: 10px;
  width: 100%;
  box-sizing: border-box;
  font-family: "Microsoft YaHei",montserrat;
  color: #2C3E50;
  font-size: 13px;
}
/*buttons*/
#msform .action-button {
  width: 100px;
  background: #27AE60;
  font-weight: bold;
  color: white;
  border: 0 none;
  border-radius: 1px;
  cursor: pointer;
  padding: 10px 5px;
  margin: 10px 5px;
}
#msform .action-button:hover, #msform .action-button:focus {
  box-shadow: 0 0 0 2px white, 0 0 0 3px #27AE60;
}
表单顶部的导航进度条的颜色显示效果使用了CSS3的counter()函数来统计步骤,根据相应的步骤填充进度条的颜色。
#progressbar {
  margin-bottom: 30px;
  overflow: hidden;
  /*CSS counters to number the steps*/
  counter-reset: step;
}
#progressbar li {
  list-style-type: none;
  color: white;
  text-transform: uppercase;
  font-size: 9px;
  width: 33.33%;
  float: left;
  position: relative;
}
#progressbar li:before {
  content: counter(step);
  counter-increment: step;
  width: 20px;
  line-height: 20px;
  display: block;
  font-size: 10px;
  color: #333;
  background: white;
  border-radius: 3px;
  margin: 0 auto 5px auto;
}
进度条本身使用的是无序列表li元素的:after伪元素来制作。由于第一个元素是不需要前面的进度条的,所以设置通过#progressbar li:first-child:after的content为none来取消它。
#progressbar li:after {
  content: '';
  width: 100%;
  height: 2px;
  background: white;
  position: absolute;
  left: -50%;
  top: 9px;
  z-index: -1; /*put it behind the numbers*/
}
#progressbar li:first-child:after {
  content: none;
}
当进度条处于激活状态时(当前步骤),进度条被设置为绿底白字。
#progressbar li.active:before,  #progressbar li.active:after{
  background: #27AE60;
  color: white;
}
JAVASCRIPT
在jQuery代码中,主要是处理“前一步”和“下一步”按钮的点击事件。该设计中使用jquery.easing.js来制作过渡动画效果。具体的代码请参考下载文件。